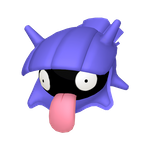
Shellder シェルダー
Water
Generation I
Bivalve Pokémon
Height 0.3m Weight 4.0kg
Shell Armor
Skill Link
Overcoat (Hidden Ability)
Pokémon Profile
Its hard shell repels any kind of attack. It is vulnerable only when its shell is open.
Base Stats
Form Base Stats:Shellder · Total 305
HP
30
Attack
65
Defense
100
Sp. Atk
45
Sp. Def
25
Speed
40
Basic Info
- Gender Ratio
- ♂ 50% / ♀ 50%
- Catch Rate
- 190(24.8%)
- Egg Groups
- Water 3
- Egg Cycles
- 20
- Base Friendship
- 50
- EV Yield
- Defense+1
- Base Experience
- 61
- Shape
- Spherical
- Color
- Purple
- Experience
- 1,250,000(Slow)
Type Matchups View full type chart →
Defensive (when attacked)
2× Weakness
Electric ×2
Grass ×2
1/2 Resistance
Fire ×0.5
Water ×0.5
Ice ×0.5
Steel ×0.5
Offensive (when attacking)
1/2 Resistance
Water ×0.5
Grass ×0.5
Dragon ×0.5
Evolution Chain
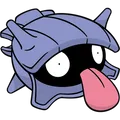
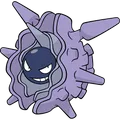
Learnset
| Level | Moves | Type | Category | Power | Accuracy | PP |
|---|---|---|---|---|---|---|
| — | Tackle | Normal | Physical | 40 | 100 | 35 |
| — | Water Gun | Water | Special | 40 | 100 | 25 |
| 4 | Withdraw | Water | Status | — | — | 40 |
| 8 | Ice Shard | Ice | Physical | 40 | 100 | 30 |
| 12 | Leer | Normal | Status | — | 100 | 30 |
| 16 | Whirlpool | Water | Special | 35 | 85 | 15 |
| 20 | Supersonic | Normal | Status | — | 55 | 20 |
| 24 | Aurora Beam | Ice | Special | 65 | 100 | 20 |
| 28 | Protect | Normal | Status | — | — | 10 |
| 32 | Razor Shell | Water | Physical | 75 | 95 | 10 |
| 36 | Iron Defense | Steel | Status | — | — | 15 |
| 40 | Ice Beam | Ice | Special | 90 | 100 | 10 |
| 44 | Shell Smash | Normal | Status | — | — | 15 |
| 48 | Hydro Pump | Water | Special | 110 | 80 | 5 |
| TM | Moves | Type | Category | Power | Accuracy | PP |
|---|---|---|---|---|---|---|
| TM001 | Take Down | Normal | Physical | 90 | 85 | 20 |
| TM007 | Protect | Normal | Status | — | — | 10 |
| TM011 | Water Pulse | Water | Special | 60 | 100 | 20 |
| TM022 | Chilling Water | Water | Special | 50 | 100 | 20 |
| TM025 | Facade | Normal | Physical | 70 | 100 | 20 |
| TM032 | Swift | Normal | Special | 60 | — | 20 |
| TM034 | Icy Wind | Ice | Special | 55 | 95 | 15 |
| TM035 | Mud Shot | Ground | Special | 55 | 95 | 15 |
| TM046 | Avalanche | Ice | Physical | 60 | 100 | 10 |
| TM047 | Endure | Normal | Status | — | — | 10 |
| TM050 | Rain Dance | Water | Status | — | — | 5 |
| TM052 | Snowscape | Ice | Status | — | — | 10 |
| TM070 | Sleep Talk | Normal | Status | — | — | 10 |
| TM076 | Rock Blast | Rock | Physical | 25 | 90 | 10 |
| TM077 | Waterfall | Water | Physical | 80 | 100 | 15 |
| TM085 | Rest | Psychic | Status | — | — | 5 |
| TM090 | Spikes | Ground | Status | — | — | 20 |
| TM091 | Toxic Spikes | Poison | Status | — | — | 20 |
| TM103 | Substitute | Normal | Status | — | — | 10 |
| TM104 | Iron Defense | Steel | Status | — | — | 15 |
| TM110 | Liquidation | Water | Physical | 85 | 100 | 10 |
| TM123 | Surf | Water | Special | 90 | 100 | 15 |
| TM124 | Ice Spinner | Ice | Physical | 80 | 100 | 15 |
| TM130 | Helping Hand | Normal | Status | — | — | 20 |
| TM135 | Ice Beam | Ice | Special | 90 | 100 | 10 |
| TM142 | Hydro Pump | Water | Special | 110 | 80 | 5 |
| TM143 | Blizzard | Ice | Special | 110 | 70 | 5 |
| TM171 | Tera Blast | Normal | Special | 80 | 100 | 10 |
| TM187 | Icicle Spear | Ice | Physical | 25 | 100 | 30 |
| TM208 | Whirlpool | Water | Special | 35 | 85 | 15 |
Wild Encounters
Generation I
Blue
Kanto
| Location | Level | Method | Chance |
|---|---|---|---|
| Seafoam Islands | Lv.30 | Walking | 20% |
| Lv.15 | Super Rod | 17% | |
| Vermilion City | Lv.15 | Super Rod | 25% |
| Cinnabar Island | Lv.15 | Super Rod | 17% |
| Route 11 | Lv.15 | Super Rod | 25% |
| Sea Route 19 | Lv.15 | Super Rod | 17% |
| Sea Route 20 | Lv.15 | Super Rod | 17% |
| Sea Route 21 | Lv.15 | Super Rod | 17% |
| Route 6 | Lv.15 | Super Rod | 25% |
Green
Kanto
| Location | Level | Method | Chance |
|---|---|---|---|
| Seafoam Islands | Lv.30 | Walking | 20% |
| Lv.15 | Super Rod | 17% | |
| Vermilion City | Lv.15 | Super Rod | 25% |
| Cinnabar Island | Lv.15 | Super Rod | 17% |
| Route 11 | Lv.15 | Super Rod | 25% |
| Sea Route 19 | Lv.15 | Super Rod | 17% |
| Sea Route 20 | Lv.15 | Super Rod | 17% |
| Sea Route 21 | Lv.15 | Super Rod | 17% |
| Route 6 | Lv.15 | Super Rod | 25% |
Red
Kanto
| Location | Level | Method | Chance |
|---|---|---|---|
| Seafoam Islands | Lv.28-33 | Walking | 20% |
| Lv.15 | Super Rod | 17% | |
| Vermilion City | Lv.15 | Super Rod | 25% |
| Cinnabar Island | Lv.15 | Super Rod | 17% |
| Route 11 | Lv.15 | Super Rod | 25% |
| Sea Route 19 | Lv.15 | Super Rod | 17% |
| Sea Route 20 | Lv.15 | Super Rod | 17% |
| Sea Route 21 | Lv.15 | Super Rod | 17% |
| Route 6 | Lv.15 | Super Rod | 25% |
Yellow
Kanto
| Location | Level | Method | Chance |
|---|---|---|---|
| Vermilion City | Lv.10 | Super Rod | 10% |
| Route 17 | Lv.25-35 | Super Rod | 20% |
| Route 18 | Lv.20-40 | Super Rod | 30% |
Generation II
Crystal
Johto
| Location | Level | Method | Chance |
|---|---|---|---|
| New Bark Town | Lv.40 | Super Rod | 30% |
| Lv.20 | Good Rod | 10% | |
| Sea Route 41 | Lv.40 | Super Rod | 30% |
| Lv.20 | Good Rod | 10% |
Kanto
| Location | Level | Method | Chance |
|---|---|---|---|
| Vermilion City | Lv.40 | Super Rod | 30% |
| Lv.20 | Good Rod | 10% | |
| Pallet Town | Lv.40 | Super Rod | 30% |
| Lv.20 | Good Rod | 10% | |
| Cinnabar Island | Lv.40 | Super Rod | 30% |
| Lv.20 | Good Rod | 10% | |
| Sea Route 20 | Lv.40 | Super Rod | 30% |
| Lv.20 | Good Rod | 10% | |
| Sea Route 21 | Lv.40 | Super Rod | 30% |
| Lv.20 | Good Rod | 10% | |
| Route 26 | Lv.40 | Super Rod | 30% |
| Lv.20 | Good Rod | 10% | |
| Route 27 | Lv.40 | Super Rod | 30% |
| Lv.20 | Good Rod | 10% |
Gold
Johto
| Location | Level | Method | Chance |
|---|---|---|---|
| New Bark Town | Lv.40 | Super Rod | 30% |
| Lv.20 | Good Rod | 10% | |
| Sea Route 41 | Lv.40 | Super Rod | 30% |
| Lv.20 | Good Rod | 10% |
Kanto
| Location | Level | Method | Chance |
|---|---|---|---|
| Vermilion City | Lv.40 | Super Rod | 30% |
| Lv.20 | Good Rod | 10% | |
| Pallet Town | Lv.40 | Super Rod | 30% |
| Lv.20 | Good Rod | 10% | |
| Cinnabar Island | Lv.40 | Super Rod | 30% |
| Lv.20 | Good Rod | 10% | |
| Sea Route 20 | Lv.40 | Super Rod | 30% |
| Lv.20 | Good Rod | 10% | |
| Sea Route 21 | Lv.40 | Super Rod | 30% |
| Lv.20 | Good Rod | 10% | |
| Route 26 | Lv.40 | Super Rod | 30% |
| Lv.20 | Good Rod | 10% | |
| Route 27 | Lv.40 | Super Rod | 30% |
| Lv.20 | Good Rod | 10% |
Silver
Johto
| Location | Level | Method | Chance |
|---|---|---|---|
| New Bark Town | Lv.40 | Super Rod | 30% |
| Lv.20 | Good Rod | 10% | |
| Sea Route 41 | Lv.40 | Super Rod | 30% |
| Lv.20 | Good Rod | 10% |
Kanto
| Location | Level | Method | Chance |
|---|---|---|---|
| Vermilion City | Lv.40 | Super Rod | 30% |
| Lv.20 | Good Rod | 10% | |
| Pallet Town | Lv.40 | Super Rod | 30% |
| Lv.20 | Good Rod | 10% | |
| Cinnabar Island | Lv.40 | Super Rod | 30% |
| Lv.20 | Good Rod | 10% | |
| Sea Route 20 | Lv.40 | Super Rod | 30% |
| Lv.20 | Good Rod | 10% | |
| Sea Route 21 | Lv.40 | Super Rod | 30% |
| Lv.20 | Good Rod | 10% | |
| Route 26 | Lv.40 | Super Rod | 30% |
| Lv.20 | Good Rod | 10% | |
| Route 27 | Lv.40 | Super Rod | 30% |
| Lv.20 | Good Rod | 10% |
Generation III
FireRed
Kanto
| Location | Level | Method | Chance |
|---|---|---|---|
| Icefall Cave | Lv.15-25 | Super Rod | 40% |
| S.S. Anne | Lv.15-25 | Super Rod | 40% |
| Vermilion City | Lv.15-25 | Super Rod | 40% |
| Pallet Town | Lv.15-25 | Super Rod | 40% |
| One Island | Lv.15-25 | Super Rod | 40% |
| Five Island | Lv.15-25 | Super Rod | 40% |
| Cinnabar Island | Lv.15-25 | Super Rod | 40% |
XD: Gale of Darkness
| Location | Level | Method | Chance |
|---|---|---|---|
| Cipher Key Lair 2f | Lv.29 | Snag | 100% |
Generation IV
Diamond
Sinnoh
| Location | Level | Method | Chance |
|---|---|---|---|
| Fuego Ironworks | Lv.20-40 | Super Rod | 15% |
| Valley Windworks | Lv.20-40 | Super Rod | 15% |
| Route 205 | Lv.20-40 | Super Rod | 15% |
HeartGold
Johto
| Location | Level | Method | Chance |
|---|---|---|---|
| New Bark Town | Lv.40 | Super Rod | 30% |
| Lv.20 | Good Rod | 10% | |
| Sea Route 41 | Lv.40 | Super Rod | 30% |
| Lv.20 | Good Rod | 10% | |
| Route 47 | Lv.40 | Super Rod | 30% |
| Lv.20 | Good Rod | 10% |
Kanto
| Location | Level | Method | Chance |
|---|---|---|---|
| Vermilion City | Lv.40 | Super Rod | 30% |
| Lv.20 | Good Rod | 10% | |
| Pallet Town | Lv.40 | Super Rod | 30% |
| Lv.20 | Good Rod | 10% | |
| Cinnabar Island | Lv.40 | Super Rod | 30% |
| Lv.20 | Good Rod | 10% | |
| Sea Route 20 | Lv.40 | Super Rod | 30% |
| Lv.20 | Good Rod | 10% | |
| Sea Route 21 | Lv.40 | Super Rod | 30% |
| Lv.20 | Good Rod | 10% | |
| Route 26 | Lv.40 | Super Rod | 30% |
| Lv.20 | Good Rod | 10% | |
| Route 27 | Lv.40 | Super Rod | 30% |
| Lv.20 | Good Rod | 10% |
Pearl
Sinnoh
| Location | Level | Method | Chance |
|---|---|---|---|
| Fuego Ironworks | Lv.20-40 | Super Rod | 15% |
| Valley Windworks | Lv.20-40 | Super Rod | 15% |
| Route 205 | Lv.20-40 | Super Rod | 15% |
Platinum
Sinnoh
| Location | Level | Method | Chance |
|---|---|---|---|
| Fuego Ironworks | Lv.20-50 | Super Rod | 15% |
| Valley Windworks | Lv.20-50 | Super Rod | 15% |
| Route 205 | Lv.20-50 | Super Rod | 15% |
SoulSilver
Johto
| Location | Level | Method | Chance |
|---|---|---|---|
| New Bark Town | Lv.40 | Super Rod | 30% |
| Lv.20 | Good Rod | 10% | |
| Sea Route 41 | Lv.40 | Super Rod | 30% |
| Lv.20 | Good Rod | 10% | |
| Route 47 | Lv.40 | Super Rod | 30% |
| Lv.20 | Good Rod | 10% |
Kanto
| Location | Level | Method | Chance |
|---|---|---|---|
| Vermilion City | Lv.40 | Super Rod | 30% |
| Lv.20 | Good Rod | 10% | |
| Pallet Town | Lv.40 | Super Rod | 30% |
| Lv.20 | Good Rod | 10% | |
| Cinnabar Island | Lv.40 | Super Rod | 30% |
| Lv.20 | Good Rod | 10% | |
| Sea Route 20 | Lv.40 | Super Rod | 30% |
| Lv.20 | Good Rod | 10% | |
| Sea Route 21 | Lv.40 | Super Rod | 30% |
| Lv.20 | Good Rod | 10% | |
| Route 26 | Lv.40 | Super Rod | 30% |
| Lv.20 | Good Rod | 10% | |
| Route 27 | Lv.40 | Super Rod | 30% |
| Lv.20 | Good Rod | 10% |
Generation V
Black
Unova
| Location | Level | Method | Chance |
|---|---|---|---|
| Undella Bay | Lv.35-55 | Super Rod | 40% |
| Lv.35-60 | Super Rod (ripples) | 40% | |
| Undella Town | Lv.35-55 | Super Rod | 40% |
| Lv.35-60 | Super Rod (ripples) | 40% | |
| Route 13 | Lv.35-55 | Super Rod | 40% |
| Lv.35-60 | Super Rod (ripples) | 40% |
Black 2
Unova
| Location | Level | Method | Chance |
|---|---|---|---|
| Seaside Cave | Lv.40-60 | Super Rod | 40% |
| Lv.40-70 | Super Rod (ripples) | 40% | |
| Undella Town | Lv.40-60 | Super Rod | 40% |
| Lv.40-70 | Super Rod (ripples) | 40% | |
| Humilau City | Lv.40-60 | Super Rod | 40% |
| Lv.40-70 | Super Rod (ripples) | 40% | |
| Route 13 | Lv.40-60 | Super Rod | 40% |
| Lv.40-70 | Super Rod (ripples) | 40% |
White
Unova
| Location | Level | Method | Chance |
|---|---|---|---|
| Undella Bay | Lv.35-55 | Super Rod | 40% |
| Lv.35-60 | Super Rod (ripples) | 40% | |
| Undella Town | Lv.35-55 | Super Rod | 40% |
| Lv.35-60 | Super Rod (ripples) | 40% | |
| Route 13 | Lv.35-55 | Super Rod | 40% |
| Lv.35-60 | Super Rod (ripples) | 40% |
White 2
Unova
| Location | Level | Method | Chance |
|---|---|---|---|
| Seaside Cave | Lv.40-60 | Super Rod | 40% |
| Lv.40-70 | Super Rod (ripples) | 40% | |
| Undella Town | Lv.40-60 | Super Rod | 40% |
| Lv.40-70 | Super Rod (ripples) | 40% | |
| Humilau City | Lv.40-60 | Super Rod | 40% |
| Lv.40-70 | Super Rod (ripples) | 40% | |
| Route 13 | Lv.40-60 | Super Rod | 40% |
| Lv.40-70 | Super Rod (ripples) | 40% |
Generation VI
Y
Kalos
| Location | Level | Method | Chance |
|---|---|---|---|
| Route 8 | Lv.25 | Good Rod | 35% |
Generation VII
Let's Go, Eevee!
Kanto
| Location | Level | Method | Chance |
|---|---|---|---|
| Seafoam Islands | Lv.39-44 | Overworld (water) | 100% |
Let's Go, Pikachu!
Kanto
| Location | Level | Method | Chance |
|---|---|---|---|
| Seafoam Islands | Lv.39-44 | Overworld (water) | 100% |
Moon
Alola
| Location | Level | Method | Chance |
|---|---|---|---|
| Kala’e Bay | Lv.10-15 | Bubbling spots | 20% |
| Lv.10-15 | Super Rod | 1% | |
| Poké Pelago | Lv.21-55 | Gift | 6% |
Sun
Alola
| Location | Level | Method | Chance |
|---|---|---|---|
| Kala’e Bay | Lv.10-15 | Bubbling spots | 20% |
| Lv.10-15 | Super Rod | 1% | |
| Poké Pelago | Lv.21-55 | Gift | 6% |
Ultra Moon
Alola
| Location | Level | Method | Chance |
|---|---|---|---|
| Kala’e Bay | Lv.10-22 | Bubbling spots | 35% |
| Lv.10-17 | Super Rod | 5% |
Ultra Sun
Alola
| Location | Level | Method | Chance |
|---|---|---|---|
| Kala’e Bay | Lv.10-22 | Bubbling spots | 35% |
| Lv.10-17 | Super Rod | 5% |
Shellder Competitive Movesets & Sets
Shellder movesets cover 6 generations and 8 formats with 11 sets in total, including moves, abilities, items, natures, EVs and Tera types with analysis.
6 Generation
8 Format
11 set
View All Movesets
Pokédex Entries
Generation I
- Red:
- Its hard shell repels any kind of attack. It is vulnerable only when its shell is open.
- Yellow:
- The shell can withstand any attack. However, when it is open, the tender body is exposed.
Generation II
- Gold:
- It swims facing backward by open ing and closing its two-piece shell. It is surprisingly fast.
- Silver:
- Grains of sand trapped in its shells mix with its body fluids to form beautiful pearls.
- Crystal:
- Clamping on to an opponent reveals its vulnerable parts, so it uses this move only as a last resort.
Generation III
- Ruby:
- At night, this Pokémon uses its broad tongue to burrow a hole in the seafloor sand and then sleep in it. While it is sleeping, SHELLDER closes its shell, but leaves its tongue hanging out.
- Emerald:
- At night, it burrows a hole in the seafloor with its broad tongue to make a place to sleep. While asleep, it closes its shell, but leaves its tongue hanging out.
- FireRed:
- It is encased in a shell that is harder than diamond. Inside, however, it is surprisingly tender.
- LeafGreen:
- Its hard shell repels any kind of attack. It is vulnerable only when its shell is open.
Generation IV
- Diamond:
- It swims backward by opening and closing its two shells. Its large tongue is always kept hanging out.
- HeartGold:
- It swims facing backward by opening and closing its two-piece shell. It is surprisingly fast.
- SoulSilver:
- Grains of sand trapped in its shells mix with its body fluids to form beautiful pearls.
Generation V
- Black:
- It swims backward by opening and closing its two shells. Its large tongue is always kept hanging out.
Generation VI
- X:
- Its hard shell repels any kind of attack. It is vulnerable only when its shell is open.
- Y:
- Clamping on to an opponent reveals its vulnerable parts, so it uses this move only as a last resort.
- Omega Ruby:
- At night, this Pokémon uses its broad tongue to burrow a hole in the seafloor sand and then sleep in it. While it is sleeping, Shellder closes its shell, but leaves its tongue hanging out.
Generation VII
- Sun:
- The hardness of its shell surpasses the hardness of a diamond. In days gone by, people used the shells to make shields.
- Moon:
- This Pokémon’s tongue is always hanging out. It uses its tongue with great dexterity to dig up sand from the seabed in its search for food.
- Ultra Sun:
- The sand that accumulates inside its shell eventually becomes a pearl. But the pearl gets in the way, so it spits it out and discards it.
- Ultra Moon:
- Even when its shell is closed, its tongue still hangs out. If you give its tongue a good yank, the shock will cause Shellder to open its shell.
- Let's Go Pikachu:
- The shell can withstand any attack. However, when it is open, the tender body is exposed.
Generation VIII
- Sword:
- It swims facing backward by opening and closing its two-piece shell. It is surprisingly fast.
- Shield:
- Its hard shell repels any kind of attack. It is vulnerable only when its shell is open.