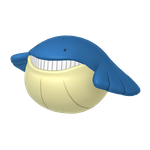
Wailmer ホエルコ
Water
Generation III
Ball Whale Pokémon
Height 2.0m Weight 130.0kg
Water Veil
Oblivious
Pressure (Hidden Ability)
Pokémon Profile
WAILMER’s nostrils are located above its eyes. This playful Pokémon loves to startle people by forcefully snorting out seawater it stores inside its body out of its nostrils.
Base Stats
Form Base Stats:Wailmer · Total 400
HP
130
Attack
70
Defense
35
Sp. Atk
70
Sp. Def
35
Speed
60
Basic Info
- Gender Ratio
- ♂ 50% / ♀ 50%
- Catch Rate
- 125(16.3%)
- Egg Groups
- Field / Water 2
- Egg Cycles
- 40
- Base Friendship
- 50
- EV Yield
- HP+1
- Base Experience
- 80
- Shape
- Piscine
- Color
- Blue
- Experience
- 1,640,000(Fluctuating)
Type Matchups View full type chart →
Defensive (when attacked)
2× Weakness
Electric ×2
Grass ×2
1/2 Resistance
Fire ×0.5
Water ×0.5
Ice ×0.5
Steel ×0.5
Offensive (when attacking)
1/2 Resistance
Water ×0.5
Grass ×0.5
Dragon ×0.5
Evolution Chain
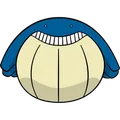
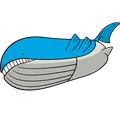
Learnset
| Level | Moves | Type | Category | Power | Accuracy | PP |
|---|---|---|---|---|---|---|
| — | Splash | Normal | Status | — | — | 40 |
| 3 | Growl | Normal | Status | — | 100 | 40 |
| 6 | Astonish | Ghost | Physical | 30 | 100 | 15 |
| 12 | Water Gun | Water | Special | 40 | 100 | 25 |
| 15 | Mist | Ice | Status | — | — | 30 |
| 18 | Water Pulse | Water | Special | 60 | 100 | 20 |
| 21 | Heavy Slam | Steel | Physical | — | 100 | 10 |
| 24 | Brine | Water | Special | 65 | 100 | 10 |
| 27 | Whirlpool | Water | Special | 35 | 85 | 15 |
| 30 | Dive | Water | Physical | 80 | 100 | 10 |
| 33 | Bounce | Flying | Physical | 85 | 85 | 5 |
| 36 | Body Slam | Normal | Physical | 85 | 100 | 15 |
| 39 | Rest | Psychic | Status | — | — | 10 |
| 42 | Amnesia | Psychic | Status | — | — | 20 |
| 45 | Hydro Pump | Water | Special | 110 | 80 | 5 |
| 48 | Water Spout | Water | Special | 150 | 100 | 5 |
| TM | Moves | Type | Category | Power | Accuracy | PP |
|---|---|---|---|---|---|---|
| TM20 | Self-Destruct | Normal | Physical | 200 | 100 | 5 |
| TM21 | Rest | Psychic | Status | — | — | 10 |
| TM24 | Snore | Normal | Special | 50 | 100 | 15 |
| TM25 | Protect | Normal | Status | — | — | 10 |
| TM27 | Icy Wind | Ice | Special | 55 | 95 | 15 |
| TM31 | Attract | Normal | Status | — | 100 | 15 |
| TM33 | Rain Dance | Water | Status | — | — | 5 |
| TM35 | Hail | Ice | Status | — | — | 10 |
| TM36 | Whirlpool | Water | Special | 35 | 85 | 15 |
| TM39 | Facade | Normal | Physical | 70 | 100 | 20 |
| TM45 | Dive | Water | Physical | 80 | 100 | 10 |
| TM46 | Weather Ball | Normal | Special | 50 | 100 | 10 |
| TM48 | Rock Tomb | Rock | Physical | 60 | 95 | 15 |
| TM52 | Bounce | Flying | Physical | 85 | 85 | 5 |
| TM55 | Brine | Water | Special | 65 | 100 | 10 |
| TM64 | Avalanche | Ice | Physical | 60 | 100 | 10 |
| TM76 | Round | Normal | Special | 60 | 100 | 15 |
| TM81 | Bulldoze | Ground | Physical | 60 | 100 | 20 |
| TM01 | Body Slam | Normal | Physical | 85 | 100 | 15 |
| TM03 | Hydro Pump | Water | Special | 110 | 80 | 5 |
| TM04 | Surf | Water | Special | 90 | 100 | 15 |
| TM05 | Ice Beam | Ice | Special | 90 | 100 | 10 |
| TM06 | Blizzard | Ice | Special | 110 | 70 | 5 |
| TM10 | Earthquake | Ground | Physical | 100 | 100 | 10 |
| TM16 | Waterfall | Water | Physical | 80 | 100 | 15 |
| TM17 | Amnesia | Psychic | Status | — | — | 20 |
| TM20 | Substitute | Normal | Status | — | — | 10 |
| TM26 | Endure | Normal | Status | — | — | 10 |
| TM27 | Sleep Talk | Normal | Status | — | — | 10 |
| TM42 | Hyper Voice | Normal | Special | 90 | 100 | 10 |
| TM69 | Zen Headbutt | Psychic | Physical | 80 | 90 | 15 |
| TM79 | Heavy Slam | Steel | Physical | — | 100 | 10 |
| TM84 | Scald | Water | Special | 80 | 100 | 15 |
| TM99 | Body Press | Fighting | Physical | 80 | 100 | 10 |
Wild Encounters
Generation III
Emerald
Hoenn
| Location | Level | Method | Chance |
|---|---|---|---|
| Slateport City | Lv.20-45 | Super Rod | 40% |
| Lv.10-30 | Good Rod | 20% | |
| Ever Grande City | Lv.30-45 | Super Rod | 40% |
| Lv.10-30 | Good Rod | 20% | |
| Pacifidlog Town | Lv.25-45 | Super Rod | 40% |
| Lv.10-30 | Good Rod | 20% | |
| Dewford Town | Lv.20-45 | Super Rod | 40% |
| Lv.10-30 | Good Rod | 20% | |
| Lilycove City | Lv.25-45 | Super Rod | 40% |
| Lv.10-30 | Good Rod | 20% | |
| Shoal Cave | Lv.20-45 | Super Rod | 40% |
| Lv.10-30 | Good Rod | 20% | |
| Seafloor Cavern | Lv.20-45 | Super Rod | 40% |
| Lv.10-30 | Good Rod | 20% | |
| Mossdeep City | Lv.25-45 | Super Rod | 40% |
| Lv.10-30 | Good Rod | 20% | |
| Route 103 | Lv.25-45 | Super Rod | 40% |
| Lv.10-30 | Good Rod | 20% | |
| Route 105 | Lv.20-45 | Super Rod | 40% |
| Lv.10-30 | Good Rod | 20% | |
| Route 106 | Lv.20-45 | Super Rod | 40% |
| Lv.10-30 | Good Rod | 20% | |
| Route 107 | Lv.20-45 | Super Rod | 40% |
| Lv.10-30 | Good Rod | 20% | |
| Route 108 | Lv.20-45 | Super Rod | 40% |
| Lv.10-30 | Good Rod | 20% | |
| Route 109 | Lv.20-45 | Super Rod | 40% |
| Lv.10-30 | Good Rod | 20% | |
| Route 110 | Lv.20-45 | Super Rod | 40% |
| Lv.10-30 | Good Rod | 20% | |
| Route 115 | Lv.20-45 | Super Rod | 40% |
| Lv.10-30 | Good Rod | 20% | |
| Route 121 | Lv.20-45 | Super Rod | 40% |
| Lv.10-30 | Good Rod | 20% | |
| Route 122 | Lv.25-45 | Super Rod | 40% |
| Lv.10-30 | Good Rod | 20% | |
| Route 123 | Lv.20-45 | Super Rod | 40% |
| Lv.10-30 | Good Rod | 20% | |
| Route 124 | Lv.25-45 | Super Rod | 40% |
| Lv.10-30 | Good Rod | 20% | |
| Route 125 | Lv.25-45 | Super Rod | 40% |
| Lv.10-30 | Good Rod | 20% | |
| Route 126 | Lv.25-45 | Super Rod | 40% |
| Lv.10-30 | Good Rod | 20% | |
| Route 127 | Lv.25-45 | Super Rod | 40% |
| Lv.10-30 | Good Rod | 20% | |
| Route 128 | Lv.30-45 | Super Rod | 40% |
| Lv.10-30 | Good Rod | 20% | |
| Route 129 | Lv.25-45 | Super Rod | 40% |
| Lv.10-30 | Good Rod | 20% | |
| Route 130 | Lv.25-45 | Super Rod | 40% |
| Lv.10-30 | Good Rod | 20% | |
| Route 131 | Lv.25-45 | Super Rod | 40% |
| Lv.10-30 | Good Rod | 20% | |
| Route 132 | Lv.30-45 | Super Rod | 40% |
| Lv.10-30 | Good Rod | 20% | |
| Route 133 | Lv.30-45 | Super Rod | 40% |
| Lv.10-30 | Good Rod | 20% | |
| Route 134 | Lv.30-45 | Super Rod | 40% |
| Lv.10-30 | Good Rod | 20% |
Ruby
Hoenn
| Location | Level | Method | Chance |
|---|---|---|---|
| Slateport City | Lv.20-45 | Super Rod | 40% |
| Lv.10-30 | Good Rod | 20% | |
| Ever Grande City | Lv.30-45 | Super Rod | 40% |
| Lv.10-30 | Good Rod | 20% | |
| Pacifidlog Town | Lv.25-45 | Super Rod | 40% |
| Lv.10-30 | Good Rod | 20% | |
| Dewford Town | Lv.20-45 | Super Rod | 40% |
| Lv.10-30 | Good Rod | 20% | |
| Lilycove City | Lv.25-45 | Super Rod | 40% |
| Lv.10-30 | Good Rod | 20% | |
| Shoal Cave | Lv.20-45 | Super Rod | 40% |
| Lv.10-30 | Good Rod | 20% | |
| Seafloor Cavern | Lv.20-45 | Super Rod | 40% |
| Lv.10-30 | Good Rod | 20% | |
| Mossdeep City | Lv.25-45 | Super Rod | 40% |
| Lv.10-30 | Good Rod | 20% | |
| Route 103 | Lv.25-45 | Super Rod | 40% |
| Lv.10-30 | Good Rod | 20% | |
| Route 105 | Lv.20-45 | Super Rod | 40% |
| Lv.10-30 | Good Rod | 20% | |
| Route 106 | Lv.20-45 | Super Rod | 40% |
| Lv.10-30 | Good Rod | 20% | |
| Route 107 | Lv.20-45 | Super Rod | 40% |
| Lv.10-30 | Good Rod | 20% | |
| Route 108 | Lv.20-45 | Super Rod | 40% |
| Lv.10-30 | Good Rod | 20% | |
| Route 109 | Lv.20-45 | Super Rod | 40% |
| Lv.10-30 | Good Rod | 20% | |
| Route 110 | Lv.20-45 | Super Rod | 40% |
| Lv.10-30 | Good Rod | 20% | |
| Route 115 | Lv.20-45 | Super Rod | 40% |
| Lv.10-30 | Good Rod | 20% | |
| Route 121 | Lv.20-45 | Super Rod | 40% |
| Lv.10-30 | Good Rod | 20% | |
| Route 122 | Lv.25-45 | Super Rod | 40% |
| Lv.10-30 | Good Rod | 20% | |
| Route 123 | Lv.20-45 | Super Rod | 40% |
| Lv.10-30 | Good Rod | 20% | |
| Route 124 | Lv.25-45 | Super Rod | 40% |
| Lv.10-30 | Good Rod | 20% | |
| Route 125 | Lv.25-45 | Super Rod | 40% |
| Lv.10-30 | Good Rod | 20% | |
| Route 126 | Lv.25-45 | Super Rod | 40% |
| Lv.10-30 | Good Rod | 20% | |
| Route 127 | Lv.25-45 | Super Rod | 40% |
| Lv.10-30 | Good Rod | 20% | |
| Route 128 | Lv.30-45 | Super Rod | 40% |
| Lv.10-30 | Good Rod | 20% | |
| Route 129 | Lv.25-45 | Super Rod | 40% |
| Lv.10-30 | Good Rod | 20% | |
| Route 130 | Lv.25-45 | Super Rod | 40% |
| Lv.10-30 | Good Rod | 20% | |
| Route 131 | Lv.25-45 | Super Rod | 40% |
| Lv.10-30 | Good Rod | 20% | |
| Route 132 | Lv.30-45 | Super Rod | 40% |
| Lv.10-30 | Good Rod | 20% | |
| Route 133 | Lv.30-45 | Super Rod | 40% |
| Lv.10-30 | Good Rod | 20% | |
| Route 134 | Lv.30-45 | Super Rod | 40% |
| Lv.10-30 | Good Rod | 20% |
Sapphire
Hoenn
| Location | Level | Method | Chance |
|---|---|---|---|
| Slateport City | Lv.20-45 | Super Rod | 40% |
| Lv.10-30 | Good Rod | 20% | |
| Ever Grande City | Lv.30-45 | Super Rod | 40% |
| Lv.10-30 | Good Rod | 20% | |
| Pacifidlog Town | Lv.25-45 | Super Rod | 40% |
| Lv.10-30 | Good Rod | 20% | |
| Dewford Town | Lv.20-45 | Super Rod | 40% |
| Lv.10-30 | Good Rod | 20% | |
| Lilycove City | Lv.25-45 | Super Rod | 40% |
| Lv.10-30 | Good Rod | 20% | |
| Shoal Cave | Lv.20-45 | Super Rod | 40% |
| Lv.10-30 | Good Rod | 20% | |
| Seafloor Cavern | Lv.20-45 | Super Rod | 40% |
| Lv.10-30 | Good Rod | 20% | |
| Mossdeep City | Lv.25-45 | Super Rod | 40% |
| Lv.10-30 | Good Rod | 20% | |
| Route 103 | Lv.25-45 | Super Rod | 40% |
| Lv.10-30 | Good Rod | 20% | |
| Route 105 | Lv.20-45 | Super Rod | 40% |
| Lv.10-30 | Good Rod | 20% | |
| Route 106 | Lv.20-45 | Super Rod | 40% |
| Lv.10-30 | Good Rod | 20% | |
| Route 107 | Lv.20-45 | Super Rod | 40% |
| Lv.10-30 | Good Rod | 20% | |
| Route 108 | Lv.20-45 | Super Rod | 40% |
| Lv.10-30 | Good Rod | 20% | |
| Route 109 | Lv.20-45 | Super Rod | 40% |
| Lv.10-30 | Good Rod | 20% | |
| Route 110 | Lv.20-45 | Super Rod | 40% |
| Lv.10-30 | Good Rod | 20% | |
| Route 115 | Lv.20-45 | Super Rod | 40% |
| Lv.10-30 | Good Rod | 20% | |
| Route 121 | Lv.20-45 | Super Rod | 40% |
| Lv.10-30 | Good Rod | 20% | |
| Route 122 | Lv.25-45 | Super Rod | 40% |
| Lv.10-30 | Good Rod | 20% | |
| Route 123 | Lv.20-45 | Super Rod | 40% |
| Lv.10-30 | Good Rod | 20% | |
| Route 124 | Lv.25-45 | Super Rod | 40% |
| Lv.10-30 | Good Rod | 20% | |
| Route 125 | Lv.25-45 | Super Rod | 40% |
| Lv.10-30 | Good Rod | 20% | |
| Route 126 | Lv.25-45 | Super Rod | 40% |
| Lv.10-30 | Good Rod | 20% | |
| Route 127 | Lv.25-45 | Super Rod | 40% |
| Lv.10-30 | Good Rod | 20% | |
| Route 128 | Lv.30-45 | Super Rod | 40% |
| Lv.10-30 | Good Rod | 20% | |
| Route 129 | Lv.25-45 | Super Rod | 40% |
| Lv.10-30 | Good Rod | 20% | |
| Route 130 | Lv.25-45 | Super Rod | 40% |
| Lv.10-30 | Good Rod | 20% | |
| Route 131 | Lv.25-45 | Super Rod | 40% |
| Lv.10-30 | Good Rod | 20% | |
| Route 132 | Lv.30-45 | Super Rod | 40% |
| Lv.10-30 | Good Rod | 20% | |
| Route 133 | Lv.30-45 | Super Rod | 40% |
| Lv.10-30 | Good Rod | 20% | |
| Route 134 | Lv.30-45 | Super Rod | 40% |
| Lv.10-30 | Good Rod | 20% |
Generation IV
Diamond
Sinnoh
| Location | Level | Method | Chance |
|---|---|---|---|
| Sea Route 223 | Lv.30-40 | Super Rod | 40% |
| Sea Route 230 | Lv.30-40 | Super Rod | 40% |
Pearl
Sinnoh
| Location | Level | Method | Chance |
|---|---|---|---|
| Sea Route 223 | Lv.30-40 | Super Rod | 40% |
| Sea Route 230 | Lv.30-40 | Super Rod | 40% |
Platinum
Sinnoh
| Location | Level | Method | Chance |
|---|---|---|---|
| Sea Route 223 | Lv.30-40 | Super Rod | 40% |
| Sea Route 230 | Lv.30-40 | Super Rod | 40% |
Generation V
Black
Unova
| Location | Level | Method | Chance |
|---|---|---|---|
| Undella Bay | Lv.25-60 | Surfing (ripples) | 60% |
| Lv.25-60 | Surfing (ripples)Spring | 30% | |
| Lv.25-60 | Surfing (ripples)Summer | 30% | |
| Lv.25-60 | Surfing (ripples)Autumn | 30% | |
| Undella Town | Lv.25-60 | Surfing (ripples) | 60% |
Black 2
Unova
| Location | Level | Method | Chance |
|---|---|---|---|
| Undella Bay | Lv.25-40 | Surfing (ripples)Winter | 60% |
| Lv.25-40 | Surfing (ripples)Spring | 30% | |
| Lv.25-40 | Surfing (ripples)Summer | 30% | |
| Lv.25-40 | Surfing (ripples)Autumn | 30% |
White
Unova
| Location | Level | Method | Chance |
|---|---|---|---|
| Undella Bay | Lv.25-60 | Surfing (ripples) | 60% |
| Lv.25-60 | Surfing (ripples)Spring | 30% | |
| Lv.25-60 | Surfing (ripples)Summer | 30% | |
| Lv.25-60 | Surfing (ripples)Autumn | 30% | |
| Undella Town | Lv.25-60 | Surfing (ripples) | 60% |
White 2
Unova
| Location | Level | Method | Chance |
|---|---|---|---|
| Undella Bay | Lv.25-40 | Surfing (ripples)Winter | 60% |
| Lv.25-40 | Surfing (ripples)Spring | 30% | |
| Lv.25-40 | Surfing (ripples)Summer | 30% | |
| Lv.25-40 | Surfing (ripples)Autumn | 30% |
Generation VI
X
Kalos
| Location | Level | Method | Chance |
|---|---|---|---|
| Ambrette Town | Lv.25-27 | Surfing | 30% |
| Cyllage City | Lv.25-27 | Surfing | 30% |
| Route 8 | Lv.25-27 | Surfing | 30% |
Y
Kalos
| Location | Level | Method | Chance |
|---|---|---|---|
| Ambrette Town | Lv.25-27 | Surfing | 30% |
| Cyllage City | Lv.25-27 | Surfing | 30% |
| Route 8 | Lv.25-27 | Surfing | 30% |
Generation VII
Moon
Alola
| Location | Level | Method | Chance |
|---|---|---|---|
| Poni Wilds | Lv.10-43 | Bubbling spots | 90% |
| Lv.10-43 | Super Rod | 20% | |
| Poni Breaker Coast | Lv.10-43 | Bubbling spots | 40% |
| Lv.10-43 | Super Rod | 20% | |
| Seafolk Village | Lv.10-43 | Bubbling spots | 40% |
| Lv.10-43 | Super Rod | 20% |
Sun
Alola
| Location | Level | Method | Chance |
|---|---|---|---|
| Poni Wilds | Lv.10-43 | Bubbling spots | 90% |
| Lv.10-43 | Super Rod | 20% | |
| Poni Breaker Coast | Lv.10-43 | Bubbling spots | 40% |
| Lv.10-43 | Super Rod | 20% | |
| Seafolk Village | Lv.10-43 | Bubbling spots | 40% |
| Lv.10-43 | Super Rod | 20% |
Ultra Moon
Alola
| Location | Level | Method | Chance |
|---|---|---|---|
| Ancient Poni Path | Lv.10-44 | Super Rod | 40% |
| Lv.10-49 | Bubbling spots | 30% | |
| Poni Breaker Coast | Lv.10-49 | Bubbling spots | 70% |
| Lv.10-44 | Super Rod | 40% | |
| Seafolk Village | Lv.10-44 | Super Rod | 40% |
| Lv.10-49 | Bubbling spots | 25% |
Ultra Sun
Alola
| Location | Level | Method | Chance |
|---|---|---|---|
| Ancient Poni Path | Lv.10-44 | Super Rod | 40% |
| Lv.10-49 | Bubbling spots | 30% | |
| Poni Breaker Coast | Lv.10-49 | Bubbling spots | 70% |
| Lv.10-44 | Super Rod | 40% | |
| Seafolk Village | Lv.10-44 | Super Rod | 40% |
| Lv.10-49 | Bubbling spots | 25% |
Wailmer Competitive Movesets & Sets
Wailmer movesets cover 5 generations and 7 formats with 12 sets in total, including moves, abilities, items, natures, EVs and Tera types with analysis.
5 Generation
7 Format
12 set
View All Movesets
Pokédex Entries
Generation III
- Ruby:
- WAILMER’s nostrils are located above its eyes. This playful Pokémon loves to startle people by forcefully snorting out seawater it stores inside its body out of its nostrils.
- Sapphire:
- WAILMER can store water inside its body to transform itself into a ball for bouncing around on the ground. By filling itself up with more water, this Pokémon can elevate the height of its bounces.
- Emerald:
- While this Pokémon usually lives in the sea, it can survive on land, although not too long. It loses vitality if its body becomes dried out.
- FireRed:
- When it sucks in a large volume of seawater, it becomes like a big, bouncy ball. It eats a ton of food daily.
Generation IV
- Diamond:
- On sunny days, it lands on beaches to bounce like a ball and play. It spouts water from its nose.
- HeartGold:
- It bounces playfully like a ball. The more seawater it swallows, the higher it bounces.
Generation V
- Black:
- On sunny days, it lands on beaches to bounce like a ball and play. It spouts water from its nose.
- Black 2:
- It eats one ton of food every day. It plays by shooting stored seawater out its blowholes with great force.
Generation VI
- X:
- It bounces playfully like a ball. The more seawater it swallows, the higher it bounces.
- Y:
- It eats one ton of food every day. It plays by shooting stored seawater out its blowholes with great force.
- Omega Ruby:
- Wailmer’s nostrils are located above its eyes. This playful Pokémon loves to startle people by forcefully snorting out seawater it stores inside its body out of its nostrils.
- Alpha Sapphire:
- Wailmer can store water inside its body to transform itself into a ball for bouncing around on the ground. By filling itself up with more water, this Pokémon can elevate the height of its bounces.
Generation VII
- Sun:
- It loves to startle people. It fills itself up with seawater and plays by bouncing around like a ball.
- Moon:
- It shows off by spraying jets of seawater from the nostrils above its eyes. It eats a solid ton of Wishiwashi every day.
- Ultra Sun:
- It swims along with its mouth open and swallows down seawater along with its food. It sprays excess water out of its nostrils.
- Ultra Moon:
- Due to their memories of when they once lived on land, pods of them will, very rarely, wash up on shore.
Generation VIII
- Sword:
- It shows off by spraying jets of seawater from the nostrils above its eyes. It eats a solid ton of Wishiwashi every day.
- Shield:
- When it sucks in a large volume of seawater, it becomes like a big, bouncy ball. It eats a ton of food daily.