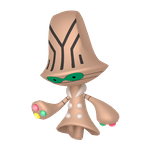
Moves
Trick Room allows Beheeyem to take advantage of its terrible Speed stat and attempt to sweep. Under Trick Room, it outspeeds virtually the entire tier. Psychic is Beheeyem's STAB attack of choice, dealing heavy damage to anything that doesn't resist it and outright OHKOing many frailer offensive Pokemon. Psyshock is an alternative option that deals significantly more damage to specially defensive Pokemon such as Clefairy and Eelektross at the cost of not OHKOing offensive Pokemon such as Pinsir after Stealth Rock damage when unboosted, which can potentially OHKO it in return. Psyshock also slightly weakens the power of Shattered Psyche, which means it has no chance to OHKO Type: Null after Stealth Rock damage even at +2, while Shattered Psyche from Psychic does. Nasty Plot boosts Beheeyem's Special Attack to absurd levels, allowing it to break specially defensive walls such as Audino with ease, especially if running Psyshock. Signal Beam allows Beheeyem to hit the Dark- and Psychic-types such as Musharna and Absol that would be able to stomach a Psychic. Alternatively, Hidden Power Ground hits Skuntank and Steel-types such as Aggron and Probopass. It should be noted, however, that Skuntank already falls to an Analytic-boosted +2 Signal Beam; nonetheless, Hidden Power Ground is a much more threatening option against it when unboosted.
Set Details
Maximum Special Attack investment and a Quiet nature maximize Beheeyem's offensive presence while minimizing Speed, which allows Beheeyem to outspeed as much as possible under Trick Room, while maximum HP investment increases Beheeyem's mixed bulk and makes setting up slightly easier as a result. Psychium Z powers up Psychic or Psyshock into Shattered Psyche, which is incredibly powerful at +2, having a chance to KO some bulky Psychic resistant foes such as Alolan Sandslash and Probopass with an Analytic boost or some prior chip damage and otherwise handily OHKOing virtually anything that doesn't resist. Psychium Z also weakens Knock Off due to Beheeyem's item being unable to be removed, which is useful for revenge killing certain Pokemon such as +1 Gurdurr. Colbur Berry is an alternative option that allows Beheeyem easier setup against Dark-types and acts as a one-time insurance against Pursuit trapping or Sucker Punch. It also lures Skuntank, allowing Beheeyem to take a Dark-type move and then retaliate with either Hidden Power Ground or Signal Beam, the former of which will always OHKO at +2, while the latter which deals heavy damage at +2 and can OHKO with some chip. Analytic punishes switching, dealing heavier damage than usual to potential switch-ins.
Usage Tips
Going for a Trick Room sweep while Beheeyem's counters are still healthy is a waste of time. While Beheeyem can punch holes in the opponent's team early-game, its HP should be conserved to maximize the chance of using Trick Room and sweeping unless it is paired with a Healing Wish user such as Audino or Musharna; in this case, it can be used as a de-facto wallbreaker until it is required to sweep. Due to this, focus on wearing down and KOing Pokemon such as Spiritomb and Skuntank in order to facilitate a sweep. Later in the game when these checks and counters are weakened or eliminated, going for the sweep with Trick Room is the way to go. Emphasize on eliminating Dark-types, as they prevent Beheeyem from spamming its STAB Psychic and waste valuable Trick Room turns in the process. The choice of whether to use Nasty Plot or Trick Room first depends on the situation. Nasty Plot, if used before Trick Room, gives Beheeyem one more turn to attack under Trick Room. However, using Trick Room first gives Beheeyem more flexibility in choosing whether to attack or boost, which is more advantageous against more offensive teams where a Nasty Plot boost may not be required to sweep. Bring Beheeyem in with a slow pivot or after a teammate has been sacrificed, as it needs as much HP as possible to pull off the two-turn setup of Trick Room and Nasty Plot. Beheeyem can take advantage of passive Pokemon such as defensive Hitmonchan, Audino, and Clefairy and set up on them, as it is not immediately threatened by any of their offensive options. It should be wary of Toxic from these Pokemon, however, as the residual poison damage can easily cut the sweep short. Lastly, make sure to save the Z-Move for Beheeyem's checks or counters, as Beheeyem hits plenty hard enough at +2 to KO neutral targets.
Team Options
If running a dedicated Trick Room team, Trick Room setters such as Carbink and Audino are important teammates, as they can set Trick Room for Beheeyem, which allows it to set up or threaten the opposing team without wasting a turn and precious HP on setting Trick Room, with Carbink's Stealth Rock chipping targets such as Gurdurr into guaranteed OHKO range and Audino's Healing Wish granting Beheeyem a safe switch-in and another chance to set up after being worn down. However, Beheeyem can still function as a self-sufficient offensive Trick Room sweeper on more traditional builds. Having another slow, powerful Pokemon to take advantage of Trick Room, such as Crabominable or Wishiwashi, is nice to have in the situation that Beheeyem is forced out with Trick Room still active. Crabominable in particular breaks through most of Beheeyem's counters while Beheeyem does the same for it in turn, with Crabominable easily taking out Dark- and Steel-types such as Skuntank and Aggron, and Beheeyem steamrolling Poison- and Psychic-types such as Qwilfish, Victreebel, and Musharna if it has Signal Beam. Skuntank and Spiritomb trap Psychic- and Ghost-types that would otherwise annoy Beheeyem and ease the need to run Signal Beam, opening Beheeyem up to running Hidden Power Ground. Fighting-types such as Gurdurr and Primeape handle the Dark-types that Beheeyem would enjoy having removed before a sweep while also beating down Steel-types such as Aggron and Probopass. Gurdurr also uses the Dark-types that Beheeyem lures in as setup fodder. Beheeyem supports them in turn by beating down checks and counters such as Musharna and Clefairy. Entry hazards from Pokemon such as Qwilfish, Regirock, and Carbink are very useful in order help put checks into KO range for Beheeyem. Silvally-Fairy checks Dark-types, provides Defog support, and helps bring Beheeyem in more safely with Parting Shot.